
Table of Contents
There’s nothing like the crunch of a perfectly cut waffle fry. They’re golden, crispy on the outside and fluffy inside. But getting that lattice pattern at home can seem like a mystery.
Maybe you’ve tried before and ended up with lumpy fries. These fries don’t hold seasoning or dip well. This guide will show you how to cut waffle fries step by step. With the right method, you can get that restaurant-style crunch at home.
Key Takeaways
- Use 3 medium Russet potatoes for their high starch content, ensuring a crispy exterior and fluffy interior.
- Soak sliced potatoes in water for 30 minutes to remove excess starch and enhance crispiness.
- Employ a mandoline’s thickest setting to achieve uniform cuts critical for even cooking.
- The crosshatch technique creates the signature lattice pattern, maximizing surface area for seasoning.
- Mastering the waffle fry cutting technique ensures restaurant-quality results every time.
Whether you’re serving them with truffle salt or classic ketchup, the secret is in the cuts. This guide will teach you how to pick the right tools, prepare potatoes, and do the crosshatch method perfectly. With just 3 tablespoons of olive oil and 1 teaspoon of sea salt, your kitchen can make amazing fries.
Follow these steps to make 3 Russet potatoes into golden, crowd-pleasing waffle fries in 1 hour 5 minutes. They’re perfect for 4 servings. No more guessing games; every bite will be perfect.
Understanding the Appeal of Waffle Fries
Waffle fries have a unique crisscross pattern that changes the game for texture and taste. They were invented in 1979 by Edgar Matsler. Since then, they’ve become a favorite, thanks to chains like Chick-Fil-A in the 1980s.
Their crinkled edges do more than look good. They increase the surface area, allowing oil and spices to stick better. This makes them crunchier on the outside and softer on the inside. It’s no wonder they’re loved in kitchens all over the world.
The History and Popularity of Waffle Fries
Waffle fries started with a simple idea: cutting potatoes into ridged shapes. They quickly became famous when fast-food chains took notice. Now, they’re a top choice, even in schools like Saint Joseph Notre Dame High School.
Students there prefer waffle fries over regular ones. Their lasting appeal comes from their taste and unique shape.
What Makes Waffle Fries Different from Regular Fries
- Shape: Waffle fries have grid-like cuts, unlike regular fries’ straight edges.
- Crispy texture: Their ridges help them crisp up faster during frying.
- Seasoning grip: The grooves trap seasoning, making flavors pop.
Why Cutting Technique Matters for Waffle Fries
Getting the best method for waffle fry cutting is key for even cooking. The right thickness and pattern are crucial. Thin slices can burn, and uneven cuts lead to uneven crispiness.
Following the right waffle fry cutting tips ensures a perfect crunch. Skipping these steps can ruin the waffle fry experience.
Essential Tools for Cutting Waffle Fries
A waffle fry cutting tutorial needs the right tools for that crisscross pattern. Start with a mandoline slicer, the key tool in any guide. The OXO Good Grips V-Blade Mandoline Slicer ($41–$46) and the Microplane Adjustable V-Blade are top picks. They offer precise thickness settings.
For those on a budget, the Amazon Basics Multi-Purpose Scraper (4.8/5 stars) is a good option. It has a 6.6-inch blade and works well.
- Mandoline blades: Choose a crinkle-cut or waffle blade. The Dash Safe Slice Mandoline ($35–$50) has 8 thickness settings but may make thicker fries.
- Safety gear: Wear cut-resistant gloves to protect your hands. Use sharp blades to avoid ragged cuts.
- Support tools: A sturdy cutting board and bowls for soaking potatoes are essential.
Handheld mandolines like the Benriner (0.3 lbs) are safe and easy to use. Make sure not to overfill your fryer. A 30-pound oil fryer can handle up to 60 pounds of fries an hour.
Pro tip: Always check if your mandoline is dishwasher safe. Brands like OXO and Microplane are known for their durability and sharp blades.
Selecting the Perfect Potatoes for Waffle Fries
Mastering the art of cutting waffle fries starts with choosing the right spuds. The right potato ensures the crispiness and texture you crave. Let’s break down how to pick and prep potatoes like a pro.
Best Potato Varieties for Waffle Fries
Opt for Russet potatoes (also called Idaho potatoes) for their high starch, low moisture content. Their dense texture delivers fluffy insides and golden crunch. For a buttery twist, try Yukon Gold potatoes, though they’ll be softer than russets. Avoid waxy potatoes like red or new potatoes—they retain moisture and won’t crisp well.
How to Check Potato Freshness and Quality
- Pick firm potatoes with smooth, unblemished skin. Avoid green patches or sprouts.
- Choose evenly sized potatoes for uniform cuts when learning how to cut waffle fries.
- Reject soft spots or wrinkled skins—these signal aging or drying.
Preparing Your Potatoes Before Cutting
Wash potatoes thoroughly to remove dirt. Peeling is optional: leave skin on for rustic texture or peel for a cleaner look. After slicing, soak cut potatoes in cold water for 30 minutes to rinse starch. This step prevents sogginess and ensures that crispy results when you master the art of cutting waffle fries.
How to Cut Waffle Fries: The Step-by-Step Method
Learning the waffle fry cutting technique begins with a clean workspace. This waffle fry cutting demonstration shows each step for perfect fries. Follow these steps to make even fries from raw potatoes.
Setting Up Your Cutting Station
Make sure your mandoline slicer is stable on a non-slip mat. Have a cutting board ready for the slices. Wear gloves and use the mandoline’s guard to keep your fingers safe. Place a bowl under the slicer to catch the fries. Check if the blade is sharp before you start.
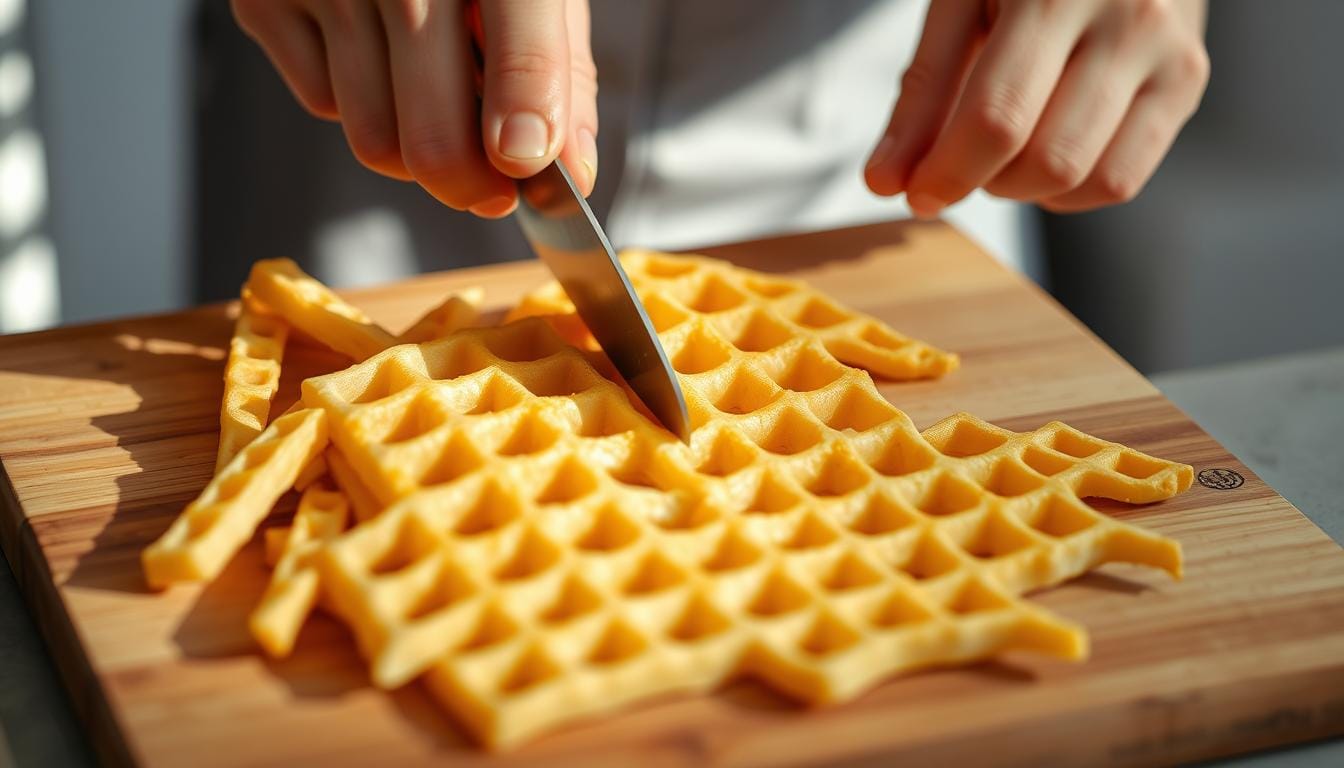
The Cross-Hatch Cutting Technique
Here’s how to make the unique lattice pattern:
- Secure the potato with the mandoline’s guard. Slice diagon from top to bottom at a 45° angle. Toss out the ends.
- Rotate the potato 90°, then slice again in the opposite diagonal. Press down firmly but smoothly to avoid uneven cuts.
- Adjust blade depth to 1/8″–1/4″ for the right texture. Thinner cuts are crisper, while thicker ones stay moist.
Achieving the Perfect Thickness
Thickness affects the fry’s texture and cooking time. Here’s a guide for the best results:
| Thickness | Cooking Time | Texture |
|---|---|---|
| 1/8″ | 18-20 mins | Crispy exterior |
| 1/4″ | 22-25 mins | Creamy center |
Test a fry’s thickness by slicing a small piece first. Adjust the blade until the cuts are even. Even thickness means even cooking.
Using a Mandoline for Perfect Waffle Cuts
Master skilled waffle fry cutting with a mandoline. This tool is made for consistent crisscross slices. First, pick a mandoline with a waffle or crisscross blade.
Look for models like the Benriner Super Slicer ($59) and Oxo Good Grips Mini Grate & Slice Set ($23). They have blades that make the grid pattern. Make sure to set the blade height to ½-inch for the best texture.
- Rotate potatoes 90° after slicing to achieve the signature crosshatch pattern.
- Wear cut-resistant gloves and use the hand guard to prevent accidents.
- Clean blades immediately after use to avoid rust and ensure longevity.
| Model | Key Features | Price |
|---|---|---|
| Benriner Super Slicer | Adjustable blade height, 7mm preset for waffle fries | $59 |
| Oxo Good Grips Mini Set | Includes straight blade and 3 attachments; dishwasher-safe | $23 |
| Chef’n Glass Mandoline | Transparent deck for visibility, 3mm-12mm thickness options | $100 |
For waffle fry cutting tips, use chopsticks to hold potatoes steady. If slices stick, rinse with water. Always replace dull blades to avoid injuries.
The Oxo Large Handheld Slicer ($29) has a locking blade for safety. Store mandolines blade-down to protect the edges. Regular care means crisp fries every time.
Alternative Cutting Methods Without Special Equipment
Creating waffle fries doesn’t need fancy tools. This waffle fry cutting tutorial shows how to use what you have at home. You can use a sharp knife or even gadgets you already have.

The Knife-Only Approach
A sharp chef’s knife, like the Victorinox Swiss Classic Chef’s Knife 8-In., can make crosshatch cuts. Start by cutting potatoes into ¼-inch thick planks. Then, rotate and cut perpendicular lines.
Be patient to get even spacing between slices. Aim for consistency to get a grid pattern like mandoline cuts.
Using Kitchen Tools You Already Have
- Cooling rack: Press a wire rack into raw potatoes to imprint grid lines before slicing.
- Box grater: The back of a grater adds texture when pressed into potato slices.
- Oxo Cutting Board: Its large surface keeps your workspace stable while cutting.
Improvised Waffle Cutting Techniques
Try these creative workarounds: Overlap crinkle-cutters at 90-degree angles to create grids, or score lines with a paring knife before slicing. A vegetable peeler can form thin strips when dragged in parallel motions.
These methods take longer but keep the signature ridges of waffle fries. While not as precise as a mandoline, with practice, you can get great results.
The best method for waffle fry cutting depends on your tools. Focus on sharp blades and steady pressure for the closest match to restaurant-style fries.
Common Mistakes to Avoid When Cutting Waffle Fries
Learning waffle fry cutting tips means knowing common mistakes. Even small errors can mess up texture and look. To cut waffle fries well, you need to be precise. But, many people make avoidable mistakes. Let’s look at the main problems and how to solve them for perfect fries every time.
Uneven Cutting Problems and Solutions
Uneven thickness causes uneven cooking. Here’s how to fix it:
- Thickness inconsistency: Use a mandoline’s adjustable settings to lock in ¼-inch slices. Rotate potatoes between cuts to ensure equal pressure.
- Broken slices: Soak potatoes in cold water 30 minutes before cutting to firm them up. Dull blades? Switch to a sharp knife or replace mandoline blades.
- Incomplete lattice patterns: Cut in two stages—first slice vertically, then horizontally. Align grids precisely to form the signature waffle shape.
Safety Precautions While Cutting
Many injuries come from rushing. Follow these steps:
- Use a claw grip to tuck fingertips inward while slicing.
- Place a damp cloth under the board to prevent slipping.
- Wear cut-resistant gloves when using mandolines or sharp knives.
Troubleshooting Waffle Fry Cuts
| Issue | Solution |
|---|---|
| Ridges not forming | Cut at 90-degree angles using a mandoline’s waffle attachment |
| Soggy edges before frying | Dry slices thoroughly with a towel post-cutting |
| Blade slippage | Freeze potatoes 30 minutes to harden them slightly |
By making these adjustments, you’ll get crisp fries. Remember, cutting waffle fries well takes patience and precision. Avoid overhandling slices to keep edges intact.
Cooking Your Freshly Cut Waffle Fries to Perfection
Learning how to cut waffle fries is just the start. The real challenge is cooking them right. Begin by heating your cooking device to the correct temperature. Air fryers should be at 400°F, ovens at 425–450°F, and deep fryers at 350–375°F.

- Air Fryer: Mix cut fries with 1 tbsp oil, arrange them in a single layer, and cook for 8–10 minutes. Shake them halfway through.
- Oven Baking: Place fries on a lined baking sheet. Bake for 20–25 minutes, flipping once, until they’re golden and crispy.
- Deep Frying: Fry in batches in peanut or vegetable oil at 350–375°F for 3–5 minutes. Drain on paper towels.
A waffle fry cutting demonstration often goes hand in hand with these steps. Thin, even cuts cook faster and get crisper. Don’t overcrowd to avoid steaming. Season with salt or spices right after cooking while they’re still hot.
“The final 2 minutes of oven time boost crunch—don’t skip the flip!”
For an extra crispy bite, try double-frying. Blanch fries in oil at 250°F, then dry them. Fry again at 375°F. Serve within 10 minutes for the best texture. A 16-ounce batch has 326 kcal per serving, perfect with light seasoning to keep flavors fresh.
Creative Seasoning and Serving Ideas for Waffle Fries
“Chick-fil-A’s 1980s introduction of waffle fries proved that seasoning can turn a simple potato into a craveable classic.”
Mastering the art of cutting waffle fries is just the beginning. Now, it’s time to play with flavors. Try classic combos like sea salt, black pepper, and smoked paprika. For a kick, add garlic powder and cayenne. A sprinkle of dried oregano or rosemary brings out earthy flavors.
- Salt & Pepper: Sprinkle immediately after cooking while fries are hot for maximum crunch.
- Garlic-Paprika Mix: Blend 2 tsp smoked paprika, 1 tsp garlic powder, and ½ tsp cayenne.
- Cajun Spice: Combine 1 tbsp each of paprika, onion powder, and dried thyme with 1 tsp cayenne.
- Truffle Parmesan: Toss fries in grated parmesan, then drizzle truffle oil.
- Taco Night Fries: Add chili powder, cumin, and lime zest for a Mexican twist.
- Asian Fusion: Coat in soy sauce, sesame seeds, and a pinch of wasabi powder.
- Sriracha-Honey: 2 tbsp sriracha + 1 tbsp honey + ½ tsp rice vinegar.
- Blue Cheese Dip: Blend ½ cup blue cheese, ¼ cup mayo, and 1 minced garlic clove.
- Curry Ketchup: Stir 1 tsp curry powder into ½ cup ketchup.
Pairing bold flavors with golden-brown cuts showcases why the step-by-step waffle fries cutting guide is just the start. Whether serving as a party snack or a family meal, these ideas turn your kitchen into a flavor laboratory.
Storing and Reheating Cut Waffle Fries
Keep your waffle fry cutting tutorial results fresh by learning how to store them right. Whether you’re working with raw or cooked fries, here are some waffle fry cutting tips to help you keep them crispy:
For raw fries:
1. Soak cut fries in cold water to stop them from turning brown. Store them in the fridge for up to 24 hours.
2. Freeze raw cuts by placing them flat on a baking sheet. Once they’re frozen, put them in airtight containers for up to 3 months.
For cooked fries:
– Let them cool down completely before putting them in airtight containers. Store them in the fridge for 2–3 days or freeze for 3 months.
– Use paper towels to line containers and soak up moisture.
Reheating methods:
- Air Fryer: 350°F for 3–5 minutes (avoid overcrowding)
- Oven: 425°F on a rack-lined baking sheet for 8–10 minutes
- Skillet: Medium-high heat with oil for 2–3 minutes per side
Microwaves are not good because they make fries soggy. Always let fries cool down before storing to avoid steam. Pro tip: Add fresh oil before reheating for extra crispiness.
Conclusion: Mastering the Art of Waffle Fry Cutting
Learning to cut waffle fries is easier than you think. This guide shows you how to do it step by step. You’ll turn raw potatoes into tasty snacks like those in restaurants.
Using a mandoline or a chef’s knife, practice makes perfect. Remember to rotate potatoes 90 degrees and slice at diagonal angles. This creates the unique crinkle-cut texture of waffle fries.
Chick-fil-A has been serving waffle fries for nearly 40 years. They cook them at 350°F first, then at 375°F to crisp them up. This method, along with quality potatoes, makes them golden and crunchy.
Regional flavors add a personal touch to waffle fries. From garlic parmesan in California to spicy coatings in the South, there’s something for everyone. This shows how you can make waffle fries your own.
Don’t be afraid to try new things. Experiment with different seasonings and tools. Share your experiences with others to build a community of home cooks.
With each attempt, you get better at making homemade waffle fries. They’re a versatile comfort food that everyone can enjoy. Even small steps in the kitchen can lead to big successes.